
Lighting completely dictates how you experience your home. Walk into a room with harsh, glaring overhead lights, and the space feels cold and uninviting. Step into a room with dim, poorly placed fixtures, and the area feels cramped, gloomy, and difficult to navigate. When upgrading your interior illumination, recessed lighting offers a sleek, modern solution that sits flush with your ceiling. However, the success of this upgrade depends entirely on a single question: exactly how many fixtures do you actually need?
If you install too many lights, your ceiling will look like an airport runway, and the room will feel blindingly bright. If you install too few, you will struggle with dark corners and harsh shadows that make daily tasks frustrating. Finding the perfect balance requires more than just guessing. It requires a strategic approach that blends mathematics, interior design principles, and a clear understanding of your home’s electrical capabilities.
For homeowners in Sacramento, planning a lighting layout also means considering local architectural styles, natural sunlight exposure, and energy efficiency. This comprehensive guide walks you through the entire process of calculating your ideal fixture count. You will learn the industry-standard formulas, how to adjust those numbers based on room function, and why professional electrical planning keeps your property safe. By the end of this guide, you will have the knowledge you need to design a beautifully balanced lighting system.
The Importance of a Proper Lighting Layout
Before diving into the math, you must understand why layout matters so much. Recessed lighting, commonly referred to as downlighting, directs light straight down from the ceiling in a conical shape. Because the light source is hidden up inside the drywall, the light spreads differently than it does from a traditional hanging chandelier or a floor lamp.
Avoiding the “Runway” Effect
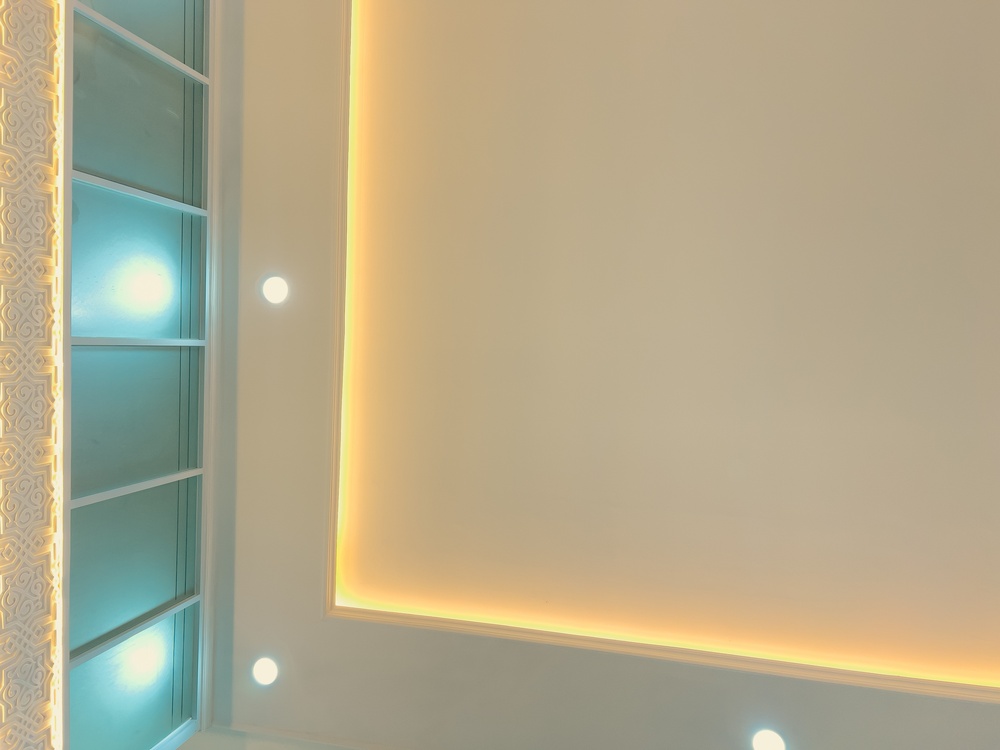
One of the most common mistakes DIYers make is over-saturating a ceiling with fixtures. They assume that more lights automatically equal better visibility. Unfortunately, slapping a massive grid of downlights across your ceiling ruins the aesthetic of the room. Designers often refer to this as the “runway effect” or “Swiss cheese ceiling.”
When you clutter the ceiling with too many trims, the eye is drawn upward to the hardware rather than downward to your beautiful furniture or architectural features. Furthermore, excessive lighting washes out the depth of a room, making it feel flat and clinical rather than warm and welcoming. A proper layout uses the absolute minimum number of fixtures required to achieve perfect illumination.
Eliminating Shadows and Glare
The opposite problem occurs when you install too few lights or place them too far apart. When the cones of light falling from the ceiling do not overlap properly, you create dark spots between the fixtures. As you walk across the room, you pass through alternating zones of bright light and heavy shadow.
Improper placement also leads to severe glare. If you place a powerful downlight directly over a seating area without a dimmer, the light shines uncomfortably into your eyes. If you place it directly behind a desk chair, it reflects violently off your computer screen. Calculating the correct quantity and placing them strategically eliminates these issues, providing a smooth, even wash of light across your entire living space.
The Basic Rule of Thumb: Ceiling Height Divided by Two
When you first begin planning your recessed lighting project, you need a starting point. Professional electricians and lighting designers frequently rely on a simple, universally accepted formula to determine basic spacing. This formula is known as the “ceiling height divided by two” rule.
How the Math Works
This rule helps you determine the physical distance that should exist between each recessed light fixture. To use this formula, simply measure the height of your ceiling from the floor to the drywall. Then, divide that number in half. The resulting number dictates how many feet apart you should space your lights.
For example, most standard homes built in Sacramento over the last few decades feature eight-foot ceilings. If you divide eight by two, you get four. Therefore, you should space your recessed lights approximately four feet apart from one another.
If you live in a modern home with sprawling, ten-foot ceilings, you divide ten by two to get five. In this room, you would space your fixtures five feet apart. This simple mathematical rule ensures that the cones of light emitted by the fixtures overlap perfectly at floor level, creating a seamless blanket of illumination without any dark spots.
Why the Basic Rule Isn’t Always Enough
While the “divide by two” rule provides an excellent foundation, it has significant limitations. This formula only tells you how far apart to space the fixtures; it does not explicitly tell you the total number of fixtures you need for the entire room. Furthermore, it assumes that every room requires the exact same level of brightness.
A home office requires drastically different lighting than a cozy master bedroom. If you apply the same strict spacing rule to both rooms, one will likely end up too dim, while the other ends up far too bright. To get a truly accurate fixture count, you must take the specific function of the room into account and calculate the actual light output required for that space.
Calculating Based on Square Footage and Lumens
To achieve professional-level results, you must move beyond basic spacing rules and calculate the exact amount of light your room needs. In the lighting industry, brightness is measured in lumens. By determining how many total lumens a room requires, you can divide that number by the lumen output of your chosen fixtures to find the perfect quantity.
Step 1: Determine Your Square Footage
The first step requires a tape measure. You need to calculate the total square footage of the room you want to light. Measure the length of the room and multiply it by the width.
For instance, if your Sacramento living room measures 15 feet long and 20 feet wide, you multiply 15 by 20. This gives you a total area of 300 square feet. Write this number down, as it forms the basis for the rest of your calculations.
Step 2: Identify Foot-Candle Requirements by Room
Next, you need to understand foot-candles. A foot-candle is a standard unit of measurement that describes how much light actually hits a surface one foot away from the source. Different rooms require different foot-candle levels based on the tasks performed inside them.
Here is a general guide to foot-candle requirements for common residential spaces:
- Kitchens (General Ambient Light): 30 to 40 foot-candles
- Kitchens (Task Areas like Islands): 70 to 80 foot-candles
- Living Rooms: 10 to 20 foot-candles
- Dining Rooms: 30 to 40 foot-candles
- Bathrooms: 70 to 80 foot-candles
- Bedrooms: 10 to 20 foot-candles
- Hallways: 5 to 10 foot-candles
As you can see, a kitchen where you chop vegetables requires significantly more intense light than a living room designed for relaxing and watching television.
Step 3: Calculate Total Lumens Needed
Once you know your square footage and your foot-candle requirement, you can easily calculate the total number of lumens the room needs. The formula is simple: multiply your square footage by your desired foot-candles.
Let us return to our 300-square-foot living room example. A living room generally requires about 20 foot-candles for comfortable ambient lighting.
- 300 square feet x 20 foot-candles = 6,000 total lumens.
To properly illuminate this living room, your lighting layout must generate a combined total of 6,000 lumens.
Step 4: Divide by Fixture Output
The final step involves looking at the recessed light fixtures you plan to purchase. Modern LED downlights list their lumen output clearly on the packaging. A standard, high-quality 6-inch LED recessed light typically produces about 800 lumens.
To find out how many of these specific fixtures you need, divide your total required lumens by the output of a single fixture.
- 6,000 total lumens / 800 lumens per fixture = 7.5 fixtures.
Since you cannot install half a fixture, you would round up or down based on your ceiling layout. In this scenario, installing 8 recessed lights would provide perfect, even illumination for your 300-square-foot living room. You would then use the “divide by two” rule to space those 8 fixtures symmetrically across the ceiling.
Adjusting for Room Type and Function
Mathematics provides a phenomenal baseline, but humans do not live in perfectly uniform boxes. The way you arrange your furniture, the color of your walls, and the specific activities you perform dictate how you should adjust your final fixture count.
Sacramento homes feature diverse interior designs, from historic properties with dark wood paneling to modern builds with bright, white walls. Dark walls absorb light, meaning you might need to add an extra fixture or two to achieve the desired brightness. Let us look at how specific rooms demand layout adjustments.
Kitchens: High Demand for Task Lighting
The kitchen is the most demanding room in the house when it comes to lighting. You perform precise, potentially dangerous tasks here, such as slicing food and working with hot stoves. Therefore, you cannot simply place a uniform grid of lights across the ceiling and call it a day.
In a kitchen, you must position the lights strategically over your countertops. If you place the lights in the center of the room, your body will cast a shadow over your workspace when you stand at the counter. To avoid this, pull the recessed lights closer to the walls, positioning them roughly 24 to 26 inches out from the wall. This drops the light directly onto the edge of the counter.
When calculating the total number of lights for a kitchen, you often need a higher density of fixtures around the perimeter and over the kitchen island, with fewer fixtures needed in the open walkways.
Living Rooms: Ambient and Accent Focus
Living rooms require ultimate flexibility. You want the room bright when hosting a party, but dim when watching a movie. When planning your living room count, focus heavily on the perimeter.
Placing lights about three feet away from the walls washes the walls with light, making the entire room feel larger and more expansive. If you have a beautiful brick fireplace or a large piece of artwork, you might add one or two specialized directional downlights to highlight those specific features. Always connect your living room layout to a high-quality dimmer switch, giving you total control over the intensity of the space.
Bathrooms: Bright but Flattering
Bathrooms present a unique challenge. You need incredibly bright light for grooming, applying makeup, and shaving. However, recessed lighting pointing straight down onto your head casts heavy, unflattering shadows under your eyes and nose.
When calculating the number of downlights for a bathroom, do not rely on them as your sole source of illumination. Use recessed lights for general ambient brightness and specialized wet-rated downlights inside the shower enclosure. Then, pair them with wall-mounted sconces positioned on either side of your vanity mirror. This layered approach provides the high foot-candle requirement necessary for a bathroom while ensuring the light hitting your face is flattering and shadow-free.
Layering Your Light: Ambient, Task, and Accent
As demonstrated in the bathroom example, recessed lighting rarely works well in isolation. Truly spectacular interior design relies on a concept called “layered lighting.” This philosophy breaks lighting down into three distinct categories.
Building a Complete System
Ambient Lighting: This is the general, overall illumination of a room. It replaces the natural sunlight when the sun goes down. A widespread grid of recessed lights serves as the perfect foundation for ambient light, ensuring you can walk through the room safely without tripping over furniture.
Task Lighting: This is highly focused light designed for specific activities. While you can use tightly grouped recessed lights over a kitchen island for task lighting, you often pair downlights with other fixtures. For instance, you might use recessed lights for the ambient layer, but install under-cabinet LED strips for your kitchen task lighting, or use a dedicated desk lamp in your home office.
Accent Lighting: This layer adds drama and visual interest. It highlights architectural features, bookcases, or artwork. Directional recessed trims (like gimbal or eyeball trims) excel at accent lighting because you can tilt the bulb to shine directly at the wall.
When calculating how many recessed lights you need, you must consider what other light sources exist in the room. If you have massive bay windows that let in abundant Sacramento sunshine, or if you plan to use multiple heavy floor lamps, you can slightly reduce your total recessed fixture count.
Electrical Capacity and Safety in Sacramento Homes
Designing a beautiful layout on paper is only the first phase of the project. Before you begin cutting holes in your ceiling, you must ensure your home can safely handle the electrical demands of your new lighting system.
Adding half a dozen new fixtures to a room changes the electrical load on your wiring. Even though modern LED lights are incredibly energy-efficient, the sheer number of fixtures, along with the necessary junction boxes, dimmer switches, and lengths of copper wire, require a robust electrical foundation.
When Do You Need an Electrical Inspection?
Many older homes in Sacramento neighborhoods like Midtown or East Sacramento still feature their original, decades-old wiring. This older wiring may lack proper grounding, or the insulation around the wires may have become brittle and degraded over time.
If you attempt to tie a brand-new lighting circuit into an obsolete electrical system, you create a severe fire hazard hidden directly behind your drywall. Before finalizing your lighting counts, you should always schedule a comprehensive electrical inspection in Sacramento. A licensed professional will evaluate the condition of your wiring, check for any code violations, and verify that your home can safely support a new installation.
Panel Upgrades and Circuit Breakers
Your main electrical panel serves as the heartbeat of your home. It receives electricity from the utility grid and distributes it to the various rooms in your house. If your home still operates on an outdated 100-amp service panel, adding a massive new whole-house lighting system might push your equipment past its safe operational limits.
If your panel is already full, or if you constantly experience flickering lights and tripped breakers when you run the vacuum cleaner, you cannot simply add more lights. You will likely need an electrical panel upgrade to increase your home’s total capacity. This upgrade ensures your new lighting system receives clean, consistent power without starving your refrigerator, air conditioner, or other vital appliances.
Even if your main panel has plenty of total capacity, the specific circuit you want to use for the living room might be overloaded. In this scenario, an electrician will perform a targeted circuit breaker replacement or run a completely new, dedicated circuit specifically for your ceiling lights. This guarantees that your lighting operates independently and safely.
Why Professional Planning Matters
Figuring out the exact number of recessed lights requires measuring, calculating lumens, understanding room functionality, and assessing electrical capacity. It is a complex, multi-layered puzzle. While online calculators and basic spacing rules offer a helpful starting point, they cannot account for the unique architectural quirks of your specific home.
Furthermore, installing these lights is not a simple weekend DIY project. Cutting into a ceiling blindly can result in severed plumbing lines, damaged structural joists, or destroyed HVAC ductwork. Working with high-voltage electricity without proper training risks severe shock, electrocution, and devastating electrical fires.
Protecting Your Home
To achieve a flawless, beautifully balanced layout that meets strict safety codes, you must rely on experienced professionals. Licensed electricians understand exactly how light interacts with physical space. They will help you calculate the perfect fixture count, select the correct color temperatures, and place the lights exactly where they will have the most visual impact.
By utilizing comprehensive services from local experts, you eliminate the guesswork. Professionals handle the complex math, the necessary permits, and the dangerous wiring. Whether you want to brighten up a single dark hallway or execute a full-home lighting transformation, expert recessed lighting installation ensures your home remains safe, efficient, and brilliantly illuminated.
Conclusion
Determining how many recessed lights you need is the most critical step in upgrading your home’s interior design. By understanding your room’s square footage, calculating the necessary lumen output, and applying strategic spacing rules, you can completely transform the way your space feels. Proper lighting makes small rooms feel larger, highlights your favorite architectural features, and provides the bright, focused illumination necessary for daily tasks.
Do not settle for dark corners, harsh shadows, or the dreaded “runway effect” on your ceiling. Take the time to plan your layout carefully and address any underlying electrical capacity issues before you begin installation.
If you are ready to modernize your Sacramento home with a perfectly balanced lighting system, reach out to TNT Electric today. Our licensed professionals will help you calculate your exact lighting needs, evaluate your electrical panel, and design a custom layout that elevates your home’s aesthetics and functionality for years to come.
Our Services at a Glance
At TNT Electric, we are a licensed electrical company based in Citrus Heights, CA, proudly serving the Sacramento area with dependable, professional service.
View Services
